
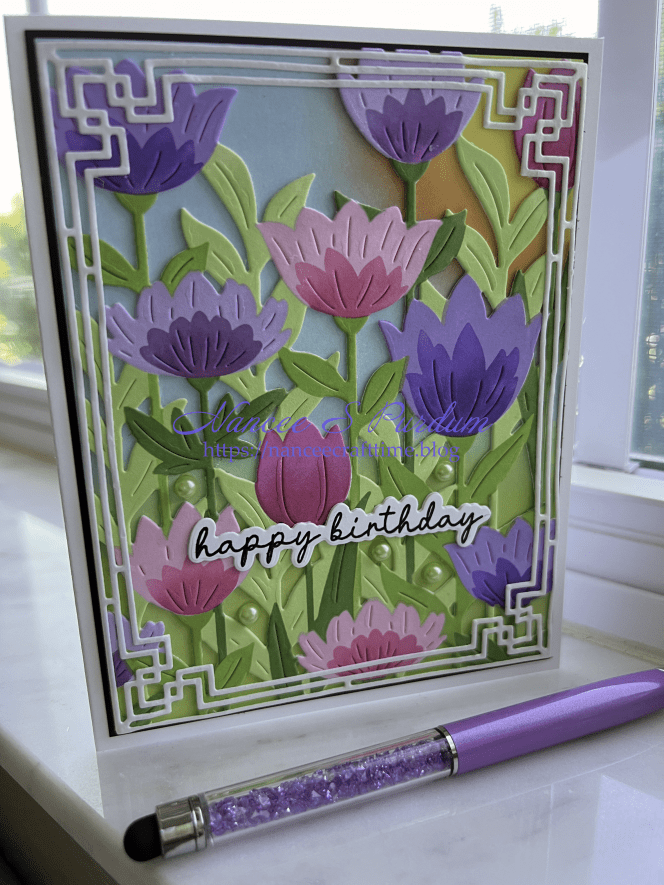
Ink blending and die cutting highlight today’s card. My dies are from Pinkfresh Studio and Altenew.

Because this is such a large floral die, I didn’t need much else to complete this card.


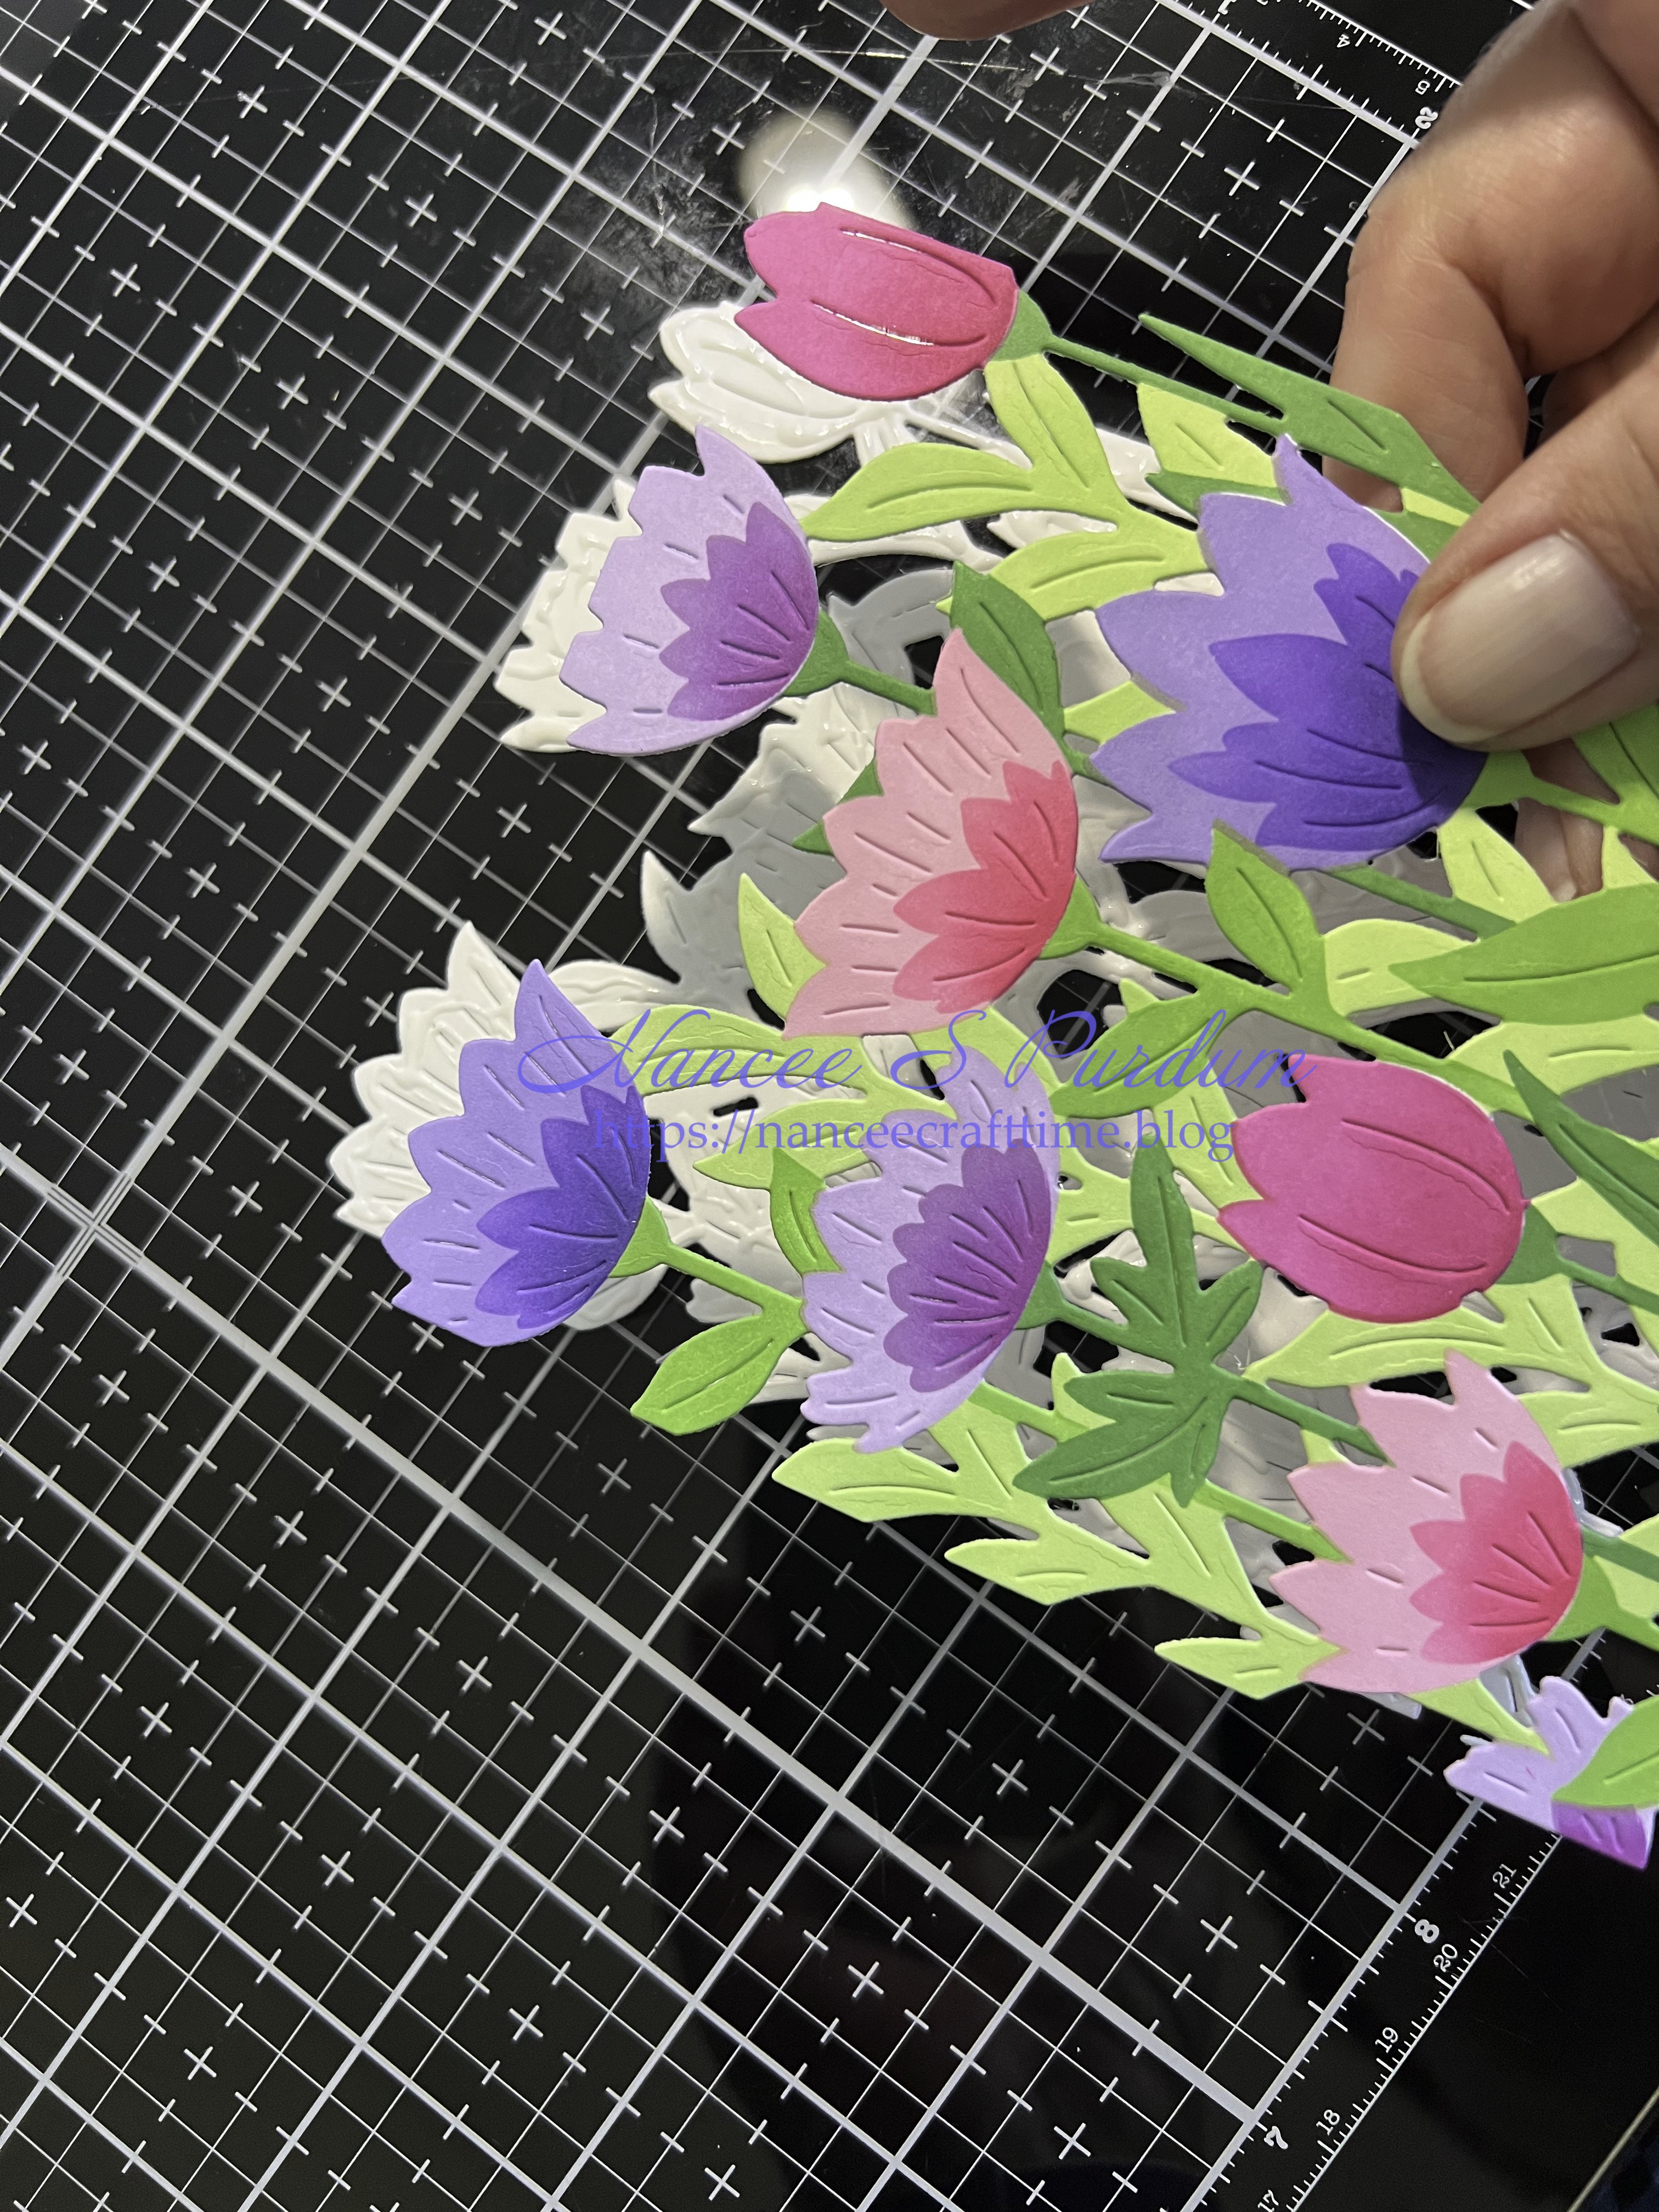
- My first step was to use the coordinating layering stencil to color my image.
- Because it is such a large image with a matching die, I wasn’t sure which would work out best, coloring and then die cutting or die cutting and then stenciling.
- My first thought was to stencil first so that as what I did.
- I used the layering stencils to color the image and then lined up the die and cut the image out.
I was able to line the die with the image using the little triangles that Pinkfresh Studio has on their stencil and die. This allows you to line up those between the stencil and die to get a nice die cut. I was pretty happy with the result but wanted to see if it was better die cutting first and then using the stencils.
- I die cut the image again using white paper.
- I placed a piece of white copy paper down and added my die cut to the top. I did this so I could line up the little triangles on each of the stencils. This helped to make sure that each of the stencils lined up correctly.
- I felt that doing the die cutting first and then the coloring turned out the best, so this is the one I decided to use on my card.
- I die cut an additional white piece and added it behind my colored image.
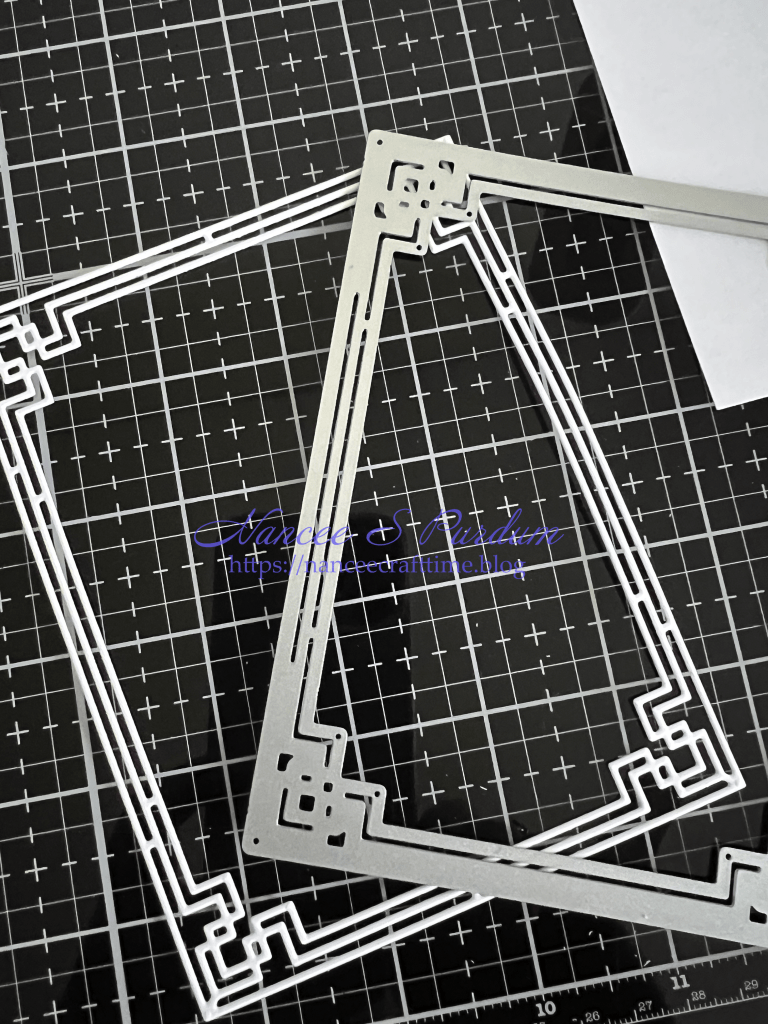
- I have the newer Deco Cover die that I wanted to use on this card to frame my flowers. This is a very delicate die.
- My initial thought was to die cut it from some gold paper. Because it is so delicate, I had some trouble with some of the “gold” from the paper being stripped off leaving some white areas. I’m not sure if it is my paper, or my die cutting machine using too much pressure. I tried several times with several different settings but got the same result.
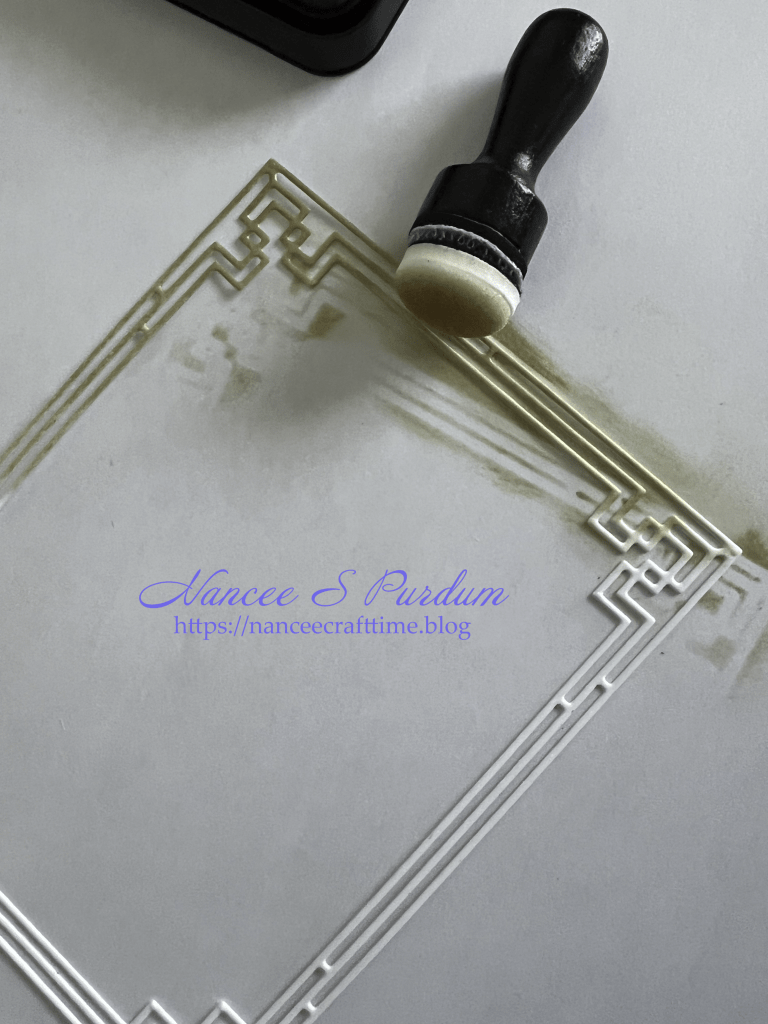
- I decided to die cut it from white paper and add gold ink so I die cut it in white paper.
- I only have one ink pad in gold and started adding it using an ink blending tool. It was covering okay, but I still wasn’t happy with it.
- I dug through my stash and found some older white “sparkling” paper and decided to try it. Out of all three, this paper seemed to work the best. I’m not sure if it is the weight of the paper or the adjustments I made on my die cutting machine.

- I wanted a simple background so I ink blended some sunshine, sky and grass.
- I die cut a mat in black to go behind my simple background.
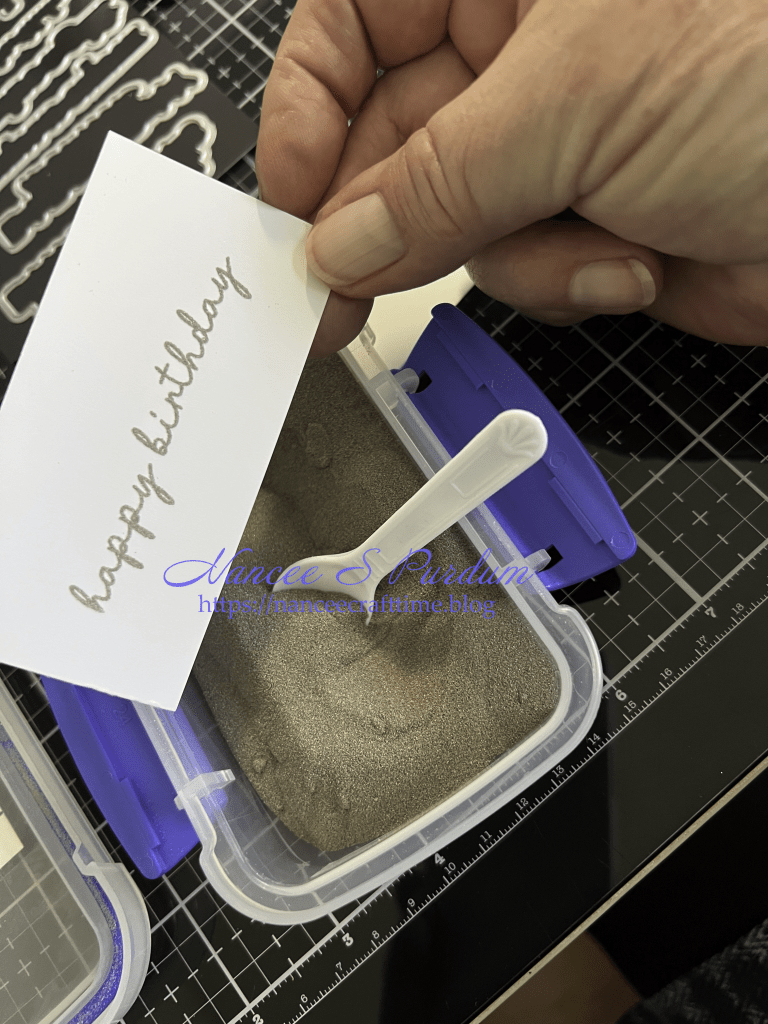
- I stamped my sentiment in Versamark Watermark ink, added gold embossing powder and heat set it.
- I used the coordinating die to cut the sentiment out.
- I then assembled my card front adding the floral die cut to the background and then the frame around the outer edges.
I think it would have been better not to add the extra layer behind the floral image. I think the “frame” would lay better if there was just a single layer of flowers.


- For the inside of my card, I used a sentiment from Riley and Company, Funny Bones. The recipient of my card enjoys a glass of wine so I felt this sentiment was a perfect choice.
- I then added some ink blending around the outside of the panel to give it a little bit of separation from my white card base.
- I added a few pearls from my stash to complete the front of my card.
Thanks for stopping by and Happy Crafting!

Supplies Used:
Pinkfresh Studio: Floral Field (die and stencil)
Altenew: Deco Cover Die
Simon Says Stamp: Birthday Basics
Riley and Company Funny Bones: Inside sentiment
Inks Used:
Altenew Fresh Dye Inks: Firefly, Grass Field, Shadow Creek, Hydrangea, Ultraviolet, Andromeda, Fuchsia, Magenta, Pinkalicious, Pink Diamond, Rubellite, Lavender Fields, Deep Iris, Midnight Violet
Distress Oxide: Squeezed Lemonade, Ripe Persimmon, Twisted Citron, Tumbled Glass
VersaFine Clair: Nocturne
Cardstock:
Gina K: Black Onyx
Hammermill Premium Color Copy Cover (white)
Embellishments:
Tim Holz Idea-ology: Christmas Droplets
Buttons Galore & More: Lucky Charmz


This is beautiful!
LikeLiked by 1 person
Thank you!
LikeLike