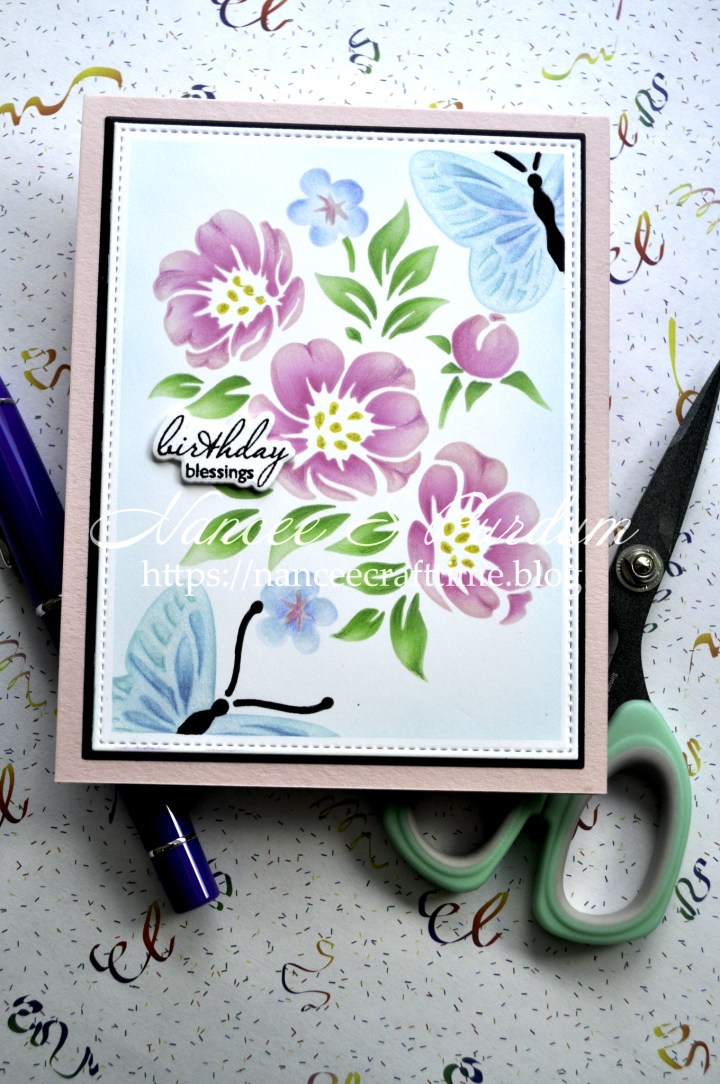
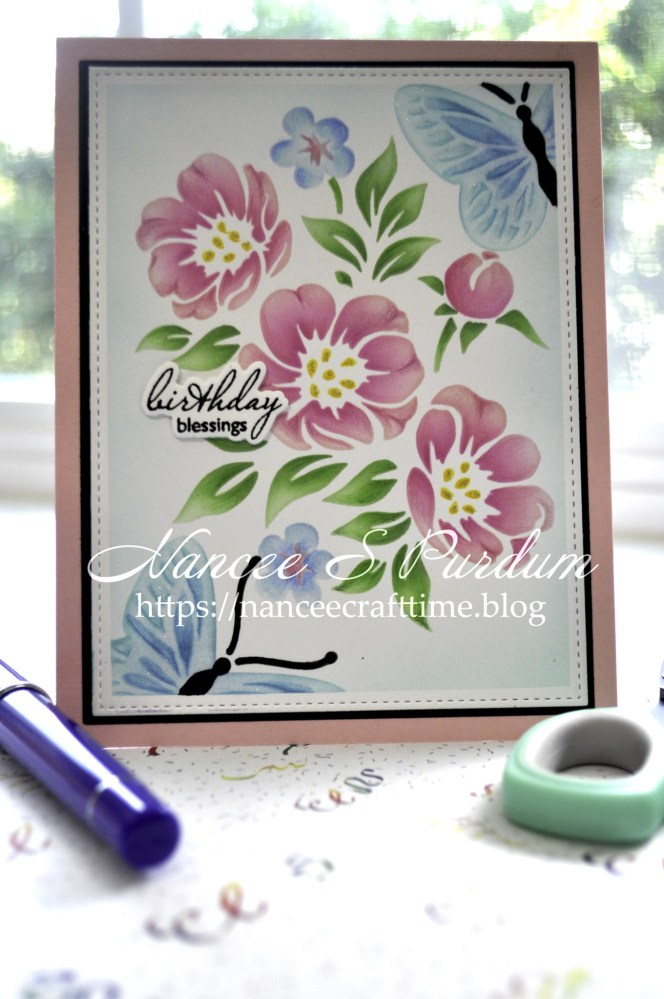
My card today is a card that uses layering stencils to create a scene and then adding more detail with other mediums.
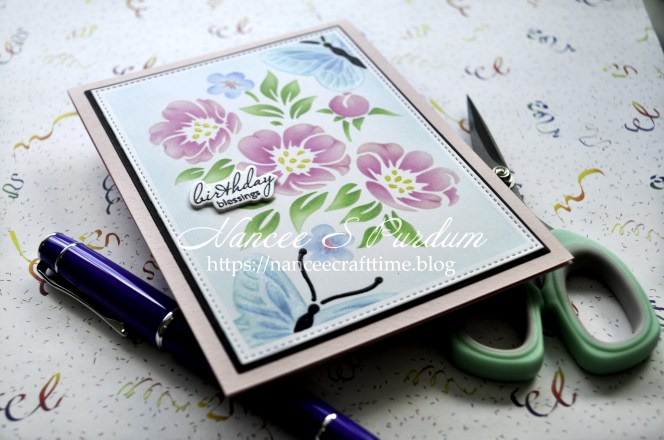
I’m using Gina K’s Create Friendship Layering stencil. Here is my process:
- First I cut a panel using Master Layout #2 out of white cardstock and black cardstock for my mat.
- Next, I planned out where I wanted my focal image to be.
- I added a border of Masking Magic around the outside to create a white border.
- I used my Ultra Stick Mat to hold both my cardstock panel and stencil in place while I applied the ink.
- Using blending brushes, I inked the first of the layering stencils using a light shade and then adding a small amount of a slightly darker shade.
- I then repeated the process for each of the remaining stencils.
- Once I was done with the stenciling, I used my colored pencils to add more detail to the images.
- When I finished with my pencils, I added even more detail with my atyou Spica glitter pens.
- For the body and antenna of the butterflies, I traced the images using my black glaze pen.
- My last step was to add a light color around the image making sure to add the color over the masking magic to define the white border.
- Once done, I removed the Masking Magic to reveal the crisp white border.
- I adhered my panel to the black mat and then to the card base.
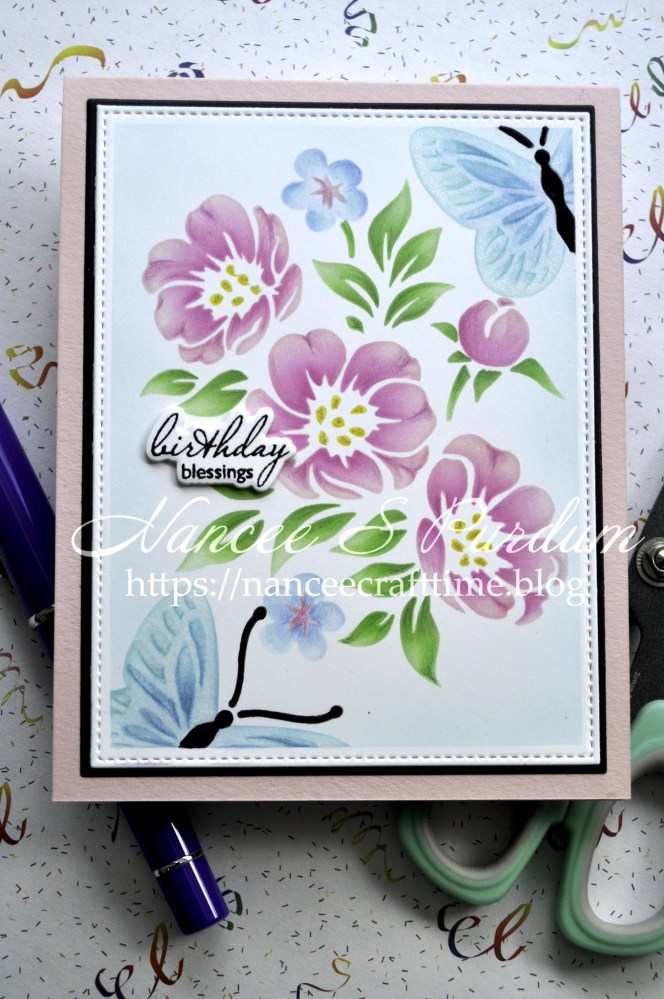
My sentiment is from Vintage Summer.
- I stamped the sentiment in Black Onyx ink.
- Then I stamped the sentiment a second time using VersaMark Watermark ink.
- After adding clear embossing powder over the VersaMark ink, I heat set the powder using my heat tool.
- Finally, I used the coordinating die to cut out the sentiment.
- I cut out three additional sentiments from white cardstock and glued them together with the stamped and embossed sentiment as my top layer.
When stamping my sentiments, I use Altenew’s stamping wheel so if I need to stamp my sentiment a second time, it will stamp in the same place.
Thanks for stopping by and Happy Crafting!

Supplies Used:
Gina K: Create Friendship Layering stencil, Vintage Summer stamp set, Black Onyx cardstock, Master Layouts #1, Master Layouts #14, Detail Clear embossing powder
Gina K inks: Applemint, Bubblegum Pink, Innocent Pink, Jet Black, Lucky Clover, Passionate Pink, Powder Blue, Sea Glass, Light Spruce, Medium Spruce, Dark Spruce, Tranquil Teal, Turquoise Sea, Wild Dandelion, Wild Wisteria, Black Onyx
Simon Says Stamp: Cotton Candy cardstock
Polychromo pencils: 123, 125, 128, 129, 119, 101, 151, 146, 145, 267, 266, 166, 171, 108, 134, 136
Other: VersaMark Watermark ink, Nuvo Aqua Shimmer, Black Glaze pen, Buttermilk Atyou Spica Glitter pen
Tools used:
Altenew: 9″ X 12″ Ultra Stick Mat, Stampwheel
Gina K: Intri-Cut Die and Embossing Machine, Blending Brushes – Standard
Simon Says Stamp: Blending Brush Set – Small, Detail Round Blending Brushes


Pretty card! What do you think of the stamping wheel? I was looking at it the other day and trying to decide if I could justify the cost – I have a couple of other stamping platforms (Misti and Tim Holtz) but I’m not 100% happy with either of them…
LikeLiked by 1 person
Thank you! I actually love the stamping wheel. I haven’t used my Misti since I got it. I was on the fence about it but finally broke down and bought it. I like how I can put more than one stamp on it at a time. I like how I don’t have to use anything to hold my paper down. I get a good impression almost every time without having to apply a lot of pressure like I do with the Misti. I also had the Tim Holtz one before the Misti. I didn’t care for that one.
LikeLiked by 1 person
Thank you! I watched a couple of YouTube reviews and it looked interesting, but then everything looks good in Youtube reviews… I think I shall have to treat myself. I’ll justify it by making some wreath cards for Christmas 😁
LikeLiked by 1 person
You are quite welcome! It is great for making wreaths! You don’t need anything else like some of the “wreath builders”.
LikeLike