
In talking with my niece, she told me that her daughter is always taking the cards that I make her. My niece recently had a birthday so I created a card for her daughter so my niece could keep the card that I made just for her.
I used a new die set that I just received and a couple of older items that I have in my stash.
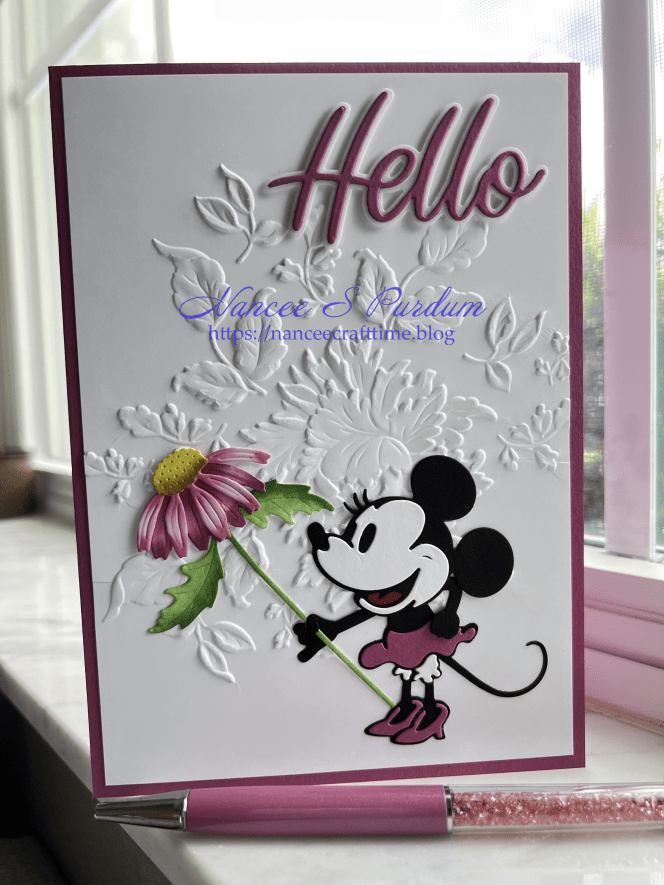
This was a fun card to make with embossing, some die cutting and ink blending. I forgot to take photos of some of the steps I used to create the card so there are not a lot of photos of my process.
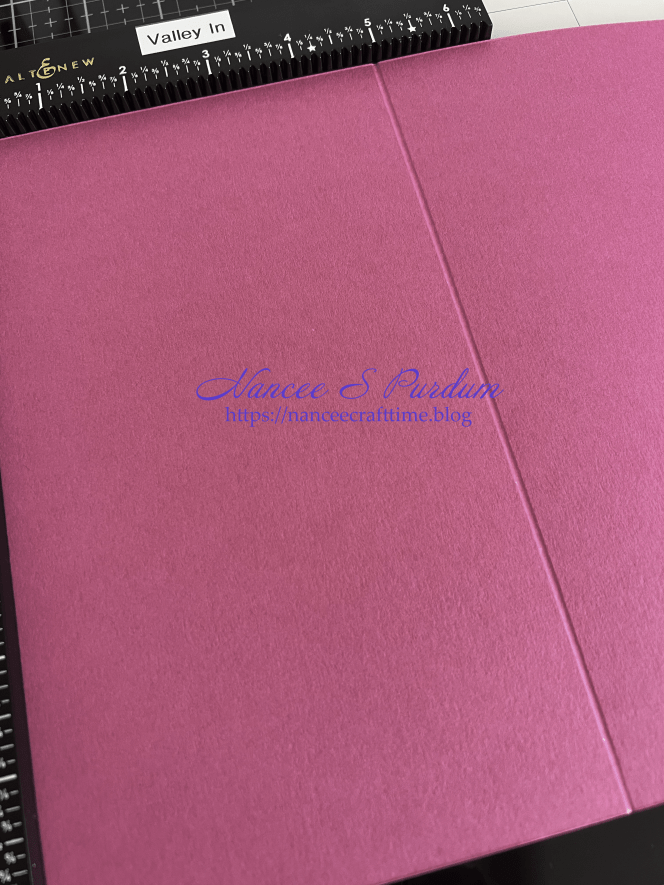
- To begin, I created my card base. I decided to make a 5 X 7 card as that is the size that I made for her mother.
- I first scored my 8 1/2 X 11 cardstock at 5 inches and then folded it at the crease.
- I then cut the folded cardstock for the 5 X 7 card.
I find that if I score my card and fold it before making any cuts it goes a little faster and I seem to get a more accurate measurement of the card base. This is especially true if I am making an A2 card (4 1/4 X 5 1/2).

- My next step was to do all of my die cutting.
- I die cut each of the pieces for Minnie using colored cardstock.
- I also die cut the pieces for the flowers using white cardstock as I wanted to add my own colors to the flowers.
- Once I had the flower pieces die cut, I added ink using a small blending brush adding color and shading to each of the pieces.
I wasn’t sure how many of the flowers I was going to use on my card, so I cut several flowers. I can always add any leftovers to my stash for future use.
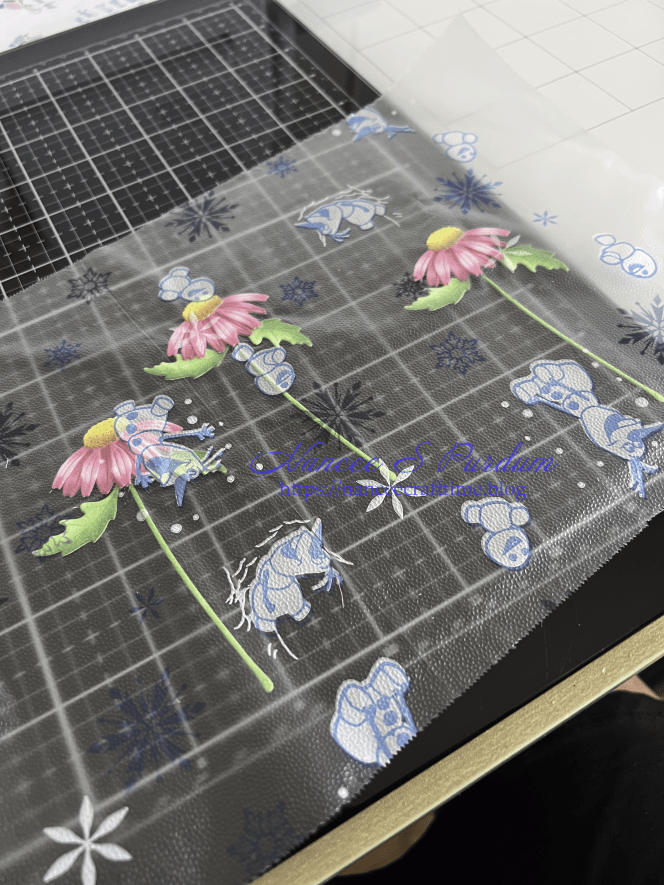
TIP: When putting together die cuts with small pieces, I find that if I arrange the pieces like I want them and then cover them with a piece of Press N Seal, I can then lift the Press N Seal and add glue. The Press N Seal helps to keep the pieces as I had arranged them. Once I have the glue applied, I let the glue dry partially before removing my pieces from the Press N Seal.
- I assembled the die cuts for Minnie and set her aside.
- I assembled my flowers and set them aside.
- My next steps were to create my background panel and sentiment.
- I cut down a piece of white cardstock to fit the front of my card.
- I spritzed the back with a light spray of water and added it to my embossing folder. (This helps to prevent the cardstock cracking when running it through your die cutting machine.)
- I die cut my sentiment from the same color of cardstock as my card base and three from white cardstock.
- I die cut the shadow for the sentiment from some vellum.
- I glued the white sentiments together and set them aside.
- My next step was to adhere my colored sentiment to the vellum shadow.
- Because I wanted my sentiment to appear to be “floating” on my card, I added the white stacked sentiments to the backside of the vellum.
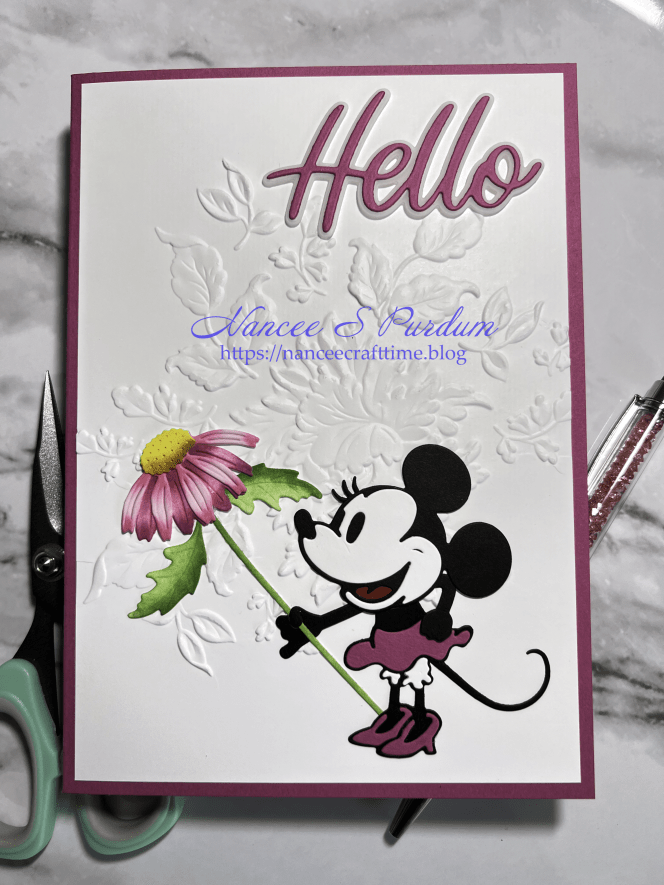
- I added the white embossed panel to my card and arranged decided where I wanted to add Minnie.
- I had intended to use several flowers on my card, however, after adding the flower to Minnie’s hand, I felt that the single flower was all that I needed.
- I then added my sentiment.
- I decided against adding any other bling to the card as I felt it didn’t need any.
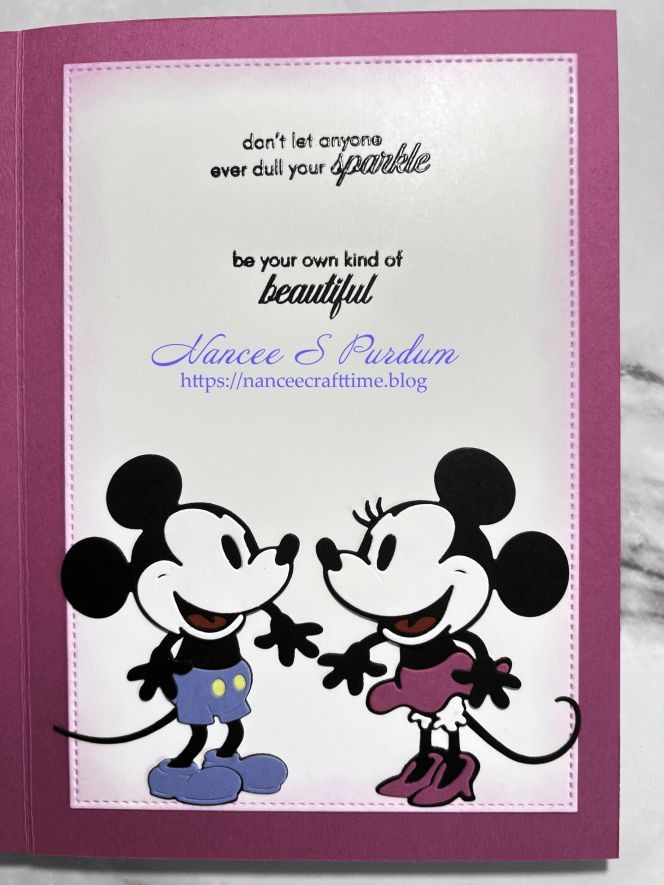
- For the inside of my card, I die cut another Minnie and a Micky from colored cardstock.
- I assembled both pieces and then chose my sentiment.
- I die cut a panel for the inside of my card and stamped my sentiment in black ink, added some clear embossing powder and then heat set my sentiment.
- I added some light ink blending around my panel and adhered it to the inside of my card.
- I added Micky and Minnie to complete my card.
This was a fun card to make, one I’m sure I will make again with a few different changes. (I don’t usually make two cards exactly the same. LOL!)
Thanks for stopping by and Happy Crafting!

Supplies Used:
Spellbinders (Simon Hurley): Floral Stems die, Steamboat Willie Duo die
Altenew: Majestic Bloom 3D Embossing folder, Oxeye Daisy stamp
Simon Says Stamp: Handwritten Hello
Cardstock:
Simon Says Stamp: Doll Pink, Vellum
Gina K: Lemon Drop, Powder Blue
Inks:
Altenew Fresh Dye Inks: Fresh Lemon, Grass Field, Milk Chocolate, Pink Diamond, Pinkalicious, Razzleberry, Rubellite, Shadow Creek

