
I’m a big Mickey and Minnie fan so when I saw that Spellbinders came out with a BetterPress Plate and die set featuring Steamboat Willie, I knew I needed to add them to my stash.
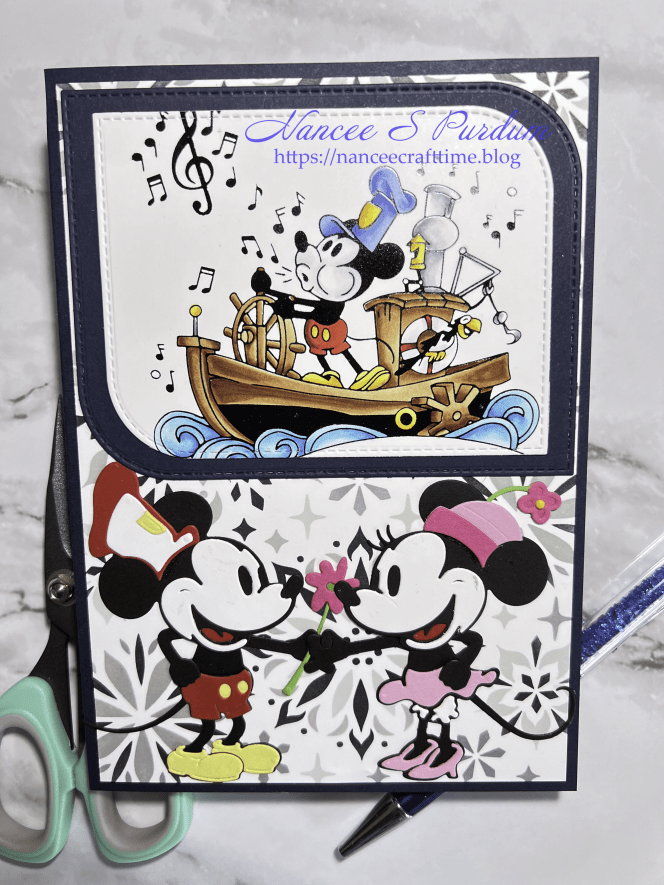
I did a little bit of foiling, die cutting, Copic coloring and ink blending to create this card. This card has a lot to it, which is not my normal card making.
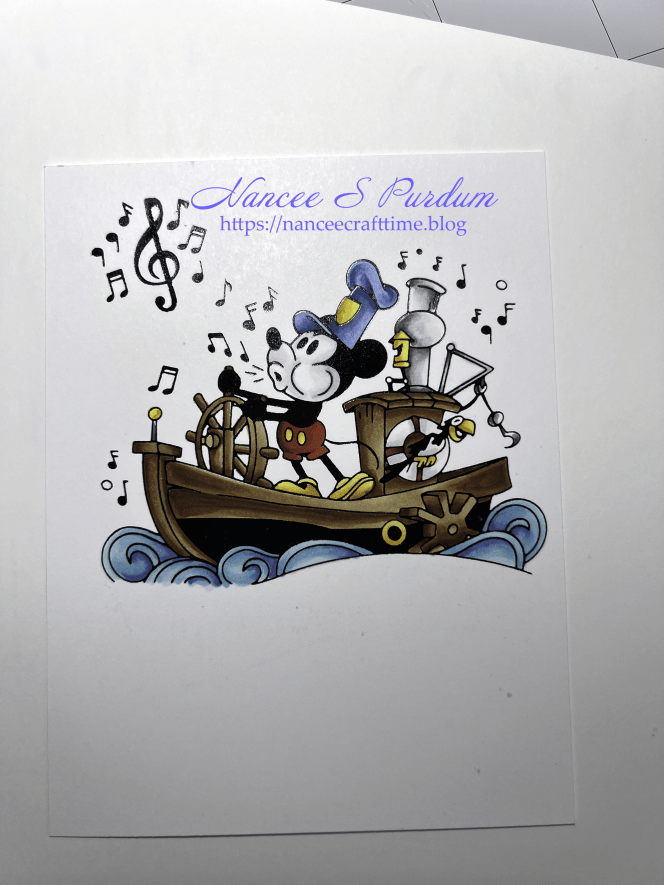
- I knew I wanted use both the BetterPress Plate and die on a card so my first step was to create the panel.
- Because you can use your BetterPress plates with foil, I decided to foil the image using black foil.
- I heated up my SpellBinders Glimmer Machine, added my BetterPress Plate, the foil and a piece of white cardstock.
- After running the heated image through my die cutting machine, I was ready to color the balance of the image.
- I used my Copic markers to add the color. Once colored, I set it aside to create the balance of my card.
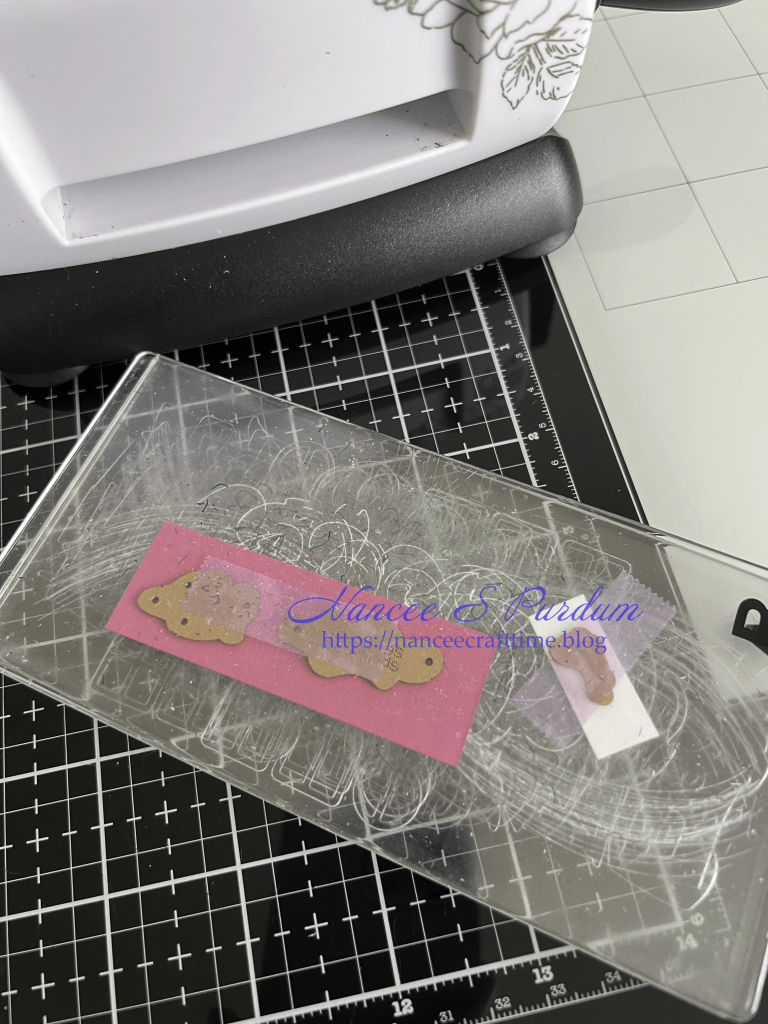
- My next step was to die cut all the pieces for both Mickey and Minnie.
- I die cut the pieces from colored cardstock.
- Since the pieces are small, I used my smaller die cutting machine and small scraps of cardstock.
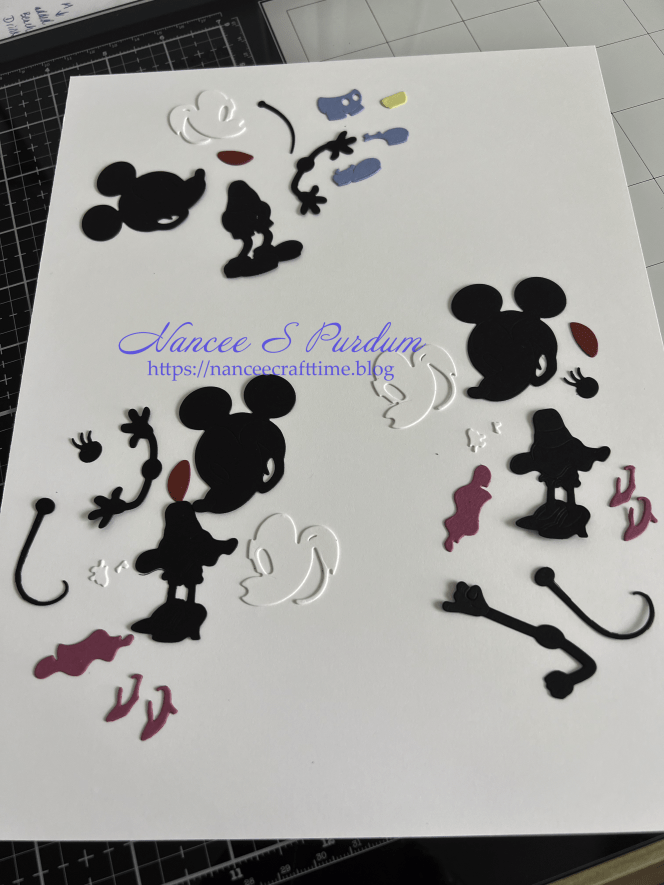
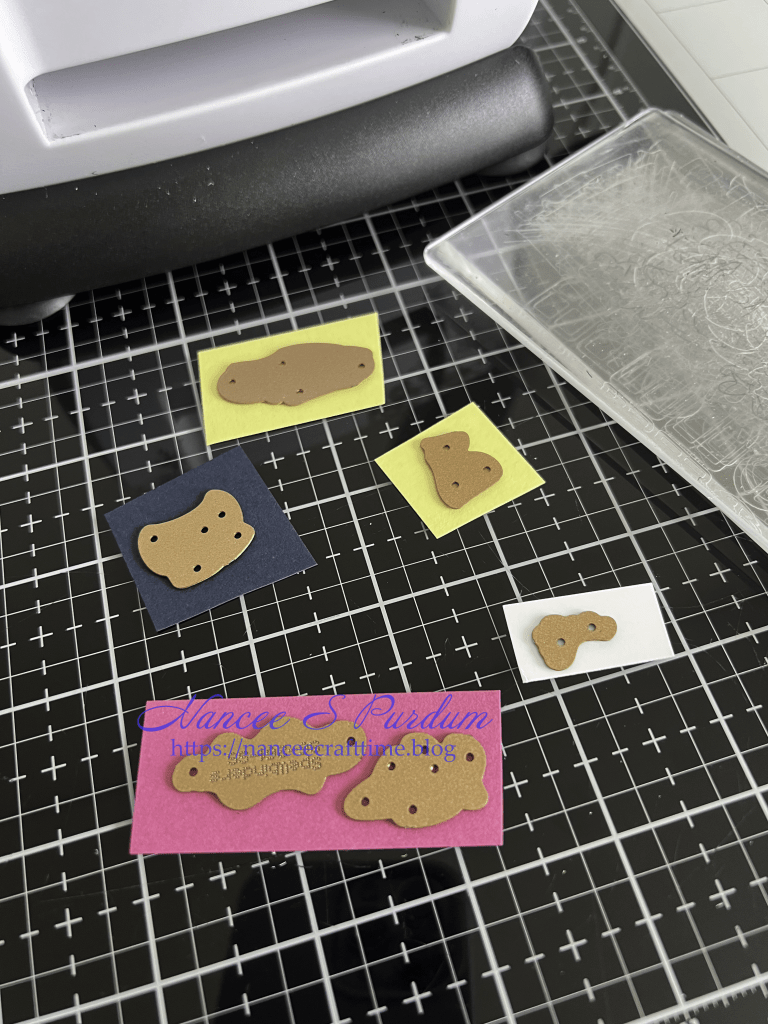
After die cutting all of my pieces, I laid them out on a piece of paper before starting the assembly process. This helped me make sure that I had all of the pieces I needed for each image.
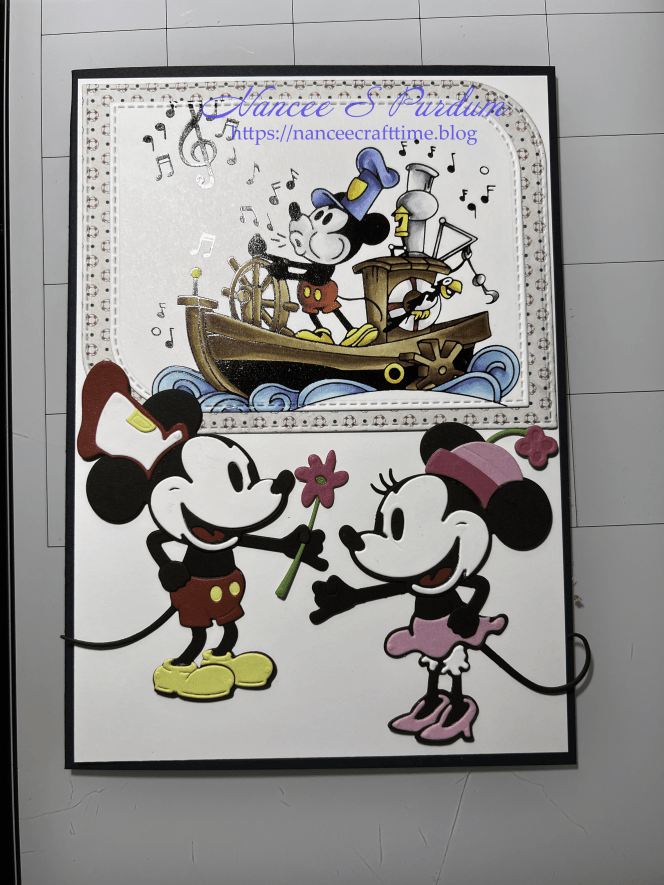
I decided to die cut my foiled and colored image down to add to the front of my card. I used an older die from My Favorite Things, which has unfortunately closed their store. I also die cut a mat from some patterned paper. (As you can see from my final card that I changed my mind on the mat.) I laid out all of my items on a piece of white cardstock and arranged them how I wanted them. I decided that I had too much white showing, so I stenciled and inked the white panel.
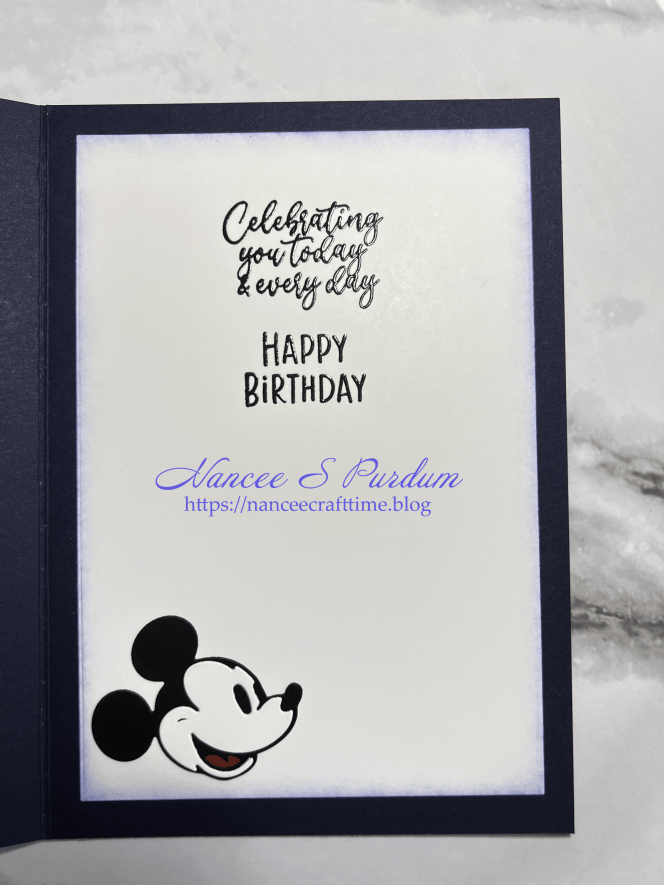
- For the inside of my card, I stamped my sentiment in black ink, added clear embossing powder and heat set it.
- I added some light inking around the panel before adhering it to the inside of my card.
- I felt it needed a little something more, so I added just the head of Mickey to the bottom corner.
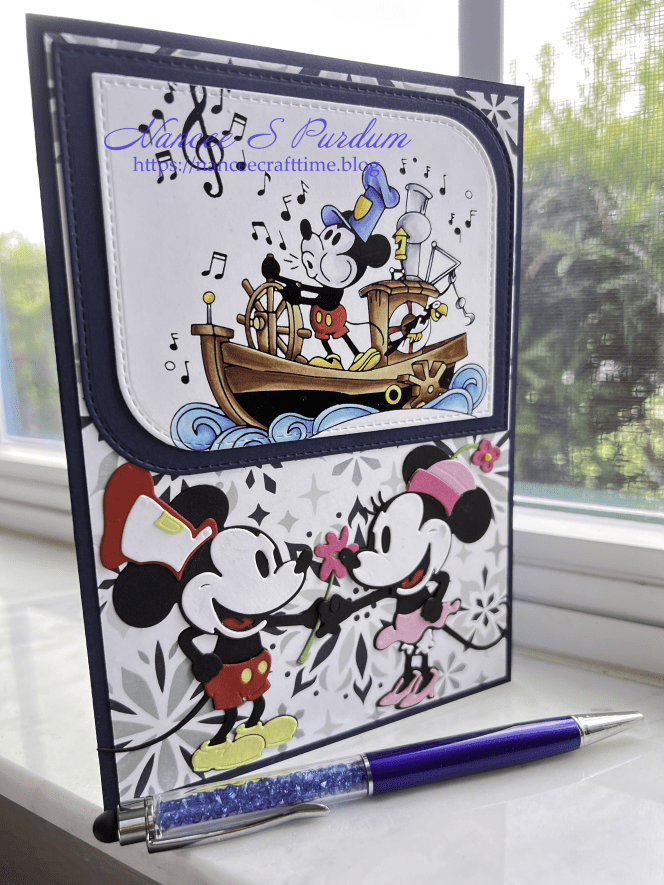
As you can see, I added a dark blue mat behind my colored image so it matched my card base. I loved putting together all of the pieces for Mickey and Minnie and I am sure I will be using them again on future cards. Who doesn’t like Mickey and Minnie!
Thanks for stopping by and Happy Crafting!

Supplies Used:
Spellbinders: Steamboat Willie Letterpress plate, Steamboat Willie Duo die, Black foil
My Favorite Things (No longer in business): Stitched Mod Rectangles die
Hero Arts: Snowflake Layering Stencil
Cardstock:
Gina K: In the Navy
Inks Used:
Altenew Fresh Dye Inks: Pure Graphite, Limestone, Industrial Diamond, Silver Stone
Copics Used:
Y13, Y15, Y17, R24, R27, R29, R59, B12, B23, B26, E35, E37, E31, E33, E39, B00, B16, BG000, BG01, C00, C1, C3, C5

