My previous card used the stamp and die set for Making Things Happen. Today, I used the BetterPress plate to add foil to my image. You can use your BetterPress plates for foiling with the Glimmer Foiling System which gives great detailed foiling.

Foiling:
- I let my Glimmer Foiling system heat up and placed my BetterPress Plate on the platform with the design facing up. I then added my foil with the pretty side facing the design on the plate. I then placed a piece of white cardstock over the top of the foil and added my top plates.
- Once the Glimmer Foiling system was ready, I ran the platform through my Intri-Cut on the embossing setting. This secured the foil to the cardstock.
I was then ready to add the color.

Stenciling:
- I added my cardstock to my Ultra Sticky Mat and began the coloring process using the coordinating stencils.
- I used my Distress inks to color my image.
- The foil resists the ink, so I didn’t have to worry about coloring over the foil.
- When I was done with the coloring, I took a soft cloth and just buffed the excess ink off of the foiling.
Die Cutting:
- Once I had my image colored, I used the coordinating die to cut out the border image using my Intri-Cut die cutting and embossing machine.
- I cut three additional copies of the border die in white cardstock to glue to the back of the colored image. This will allow the border to be “raised” above the card base.
Sentiment:
- For my sentiment, I used my powder tool to rub across my cardstock to remove any oils from my handling of the paper.
- I stamped my image using VersaMark Watermark ink and added my embossing powder.
- I heat set the sentiment using my heat tool and then die cut the sentiment using the coordinating die. I didn’t want the sentiment to be the same height as my border so I only used two extra die cut pieces behind my sentiment.

Card panel:
- I die cut a piece of white cardstock and eggplant cardstock for a mat using Master Layouts #1.
- I added the white cardstock to my Ultra Sticky Mat and began ink blending with my blending brush and Dusty Concord Distress ink.
- I started on the outside and worked my way towards the middle of my card. I made sure when adding the ink that I did not cover the center of the cardstock. I applied a heavier coat of ink on the outside and a lighter coat as I worked my way towards the middle.
- Once I had my panel they way I wanted it, I added it to the eggplant mat and then onto a white cardbase.
Putting it all together:
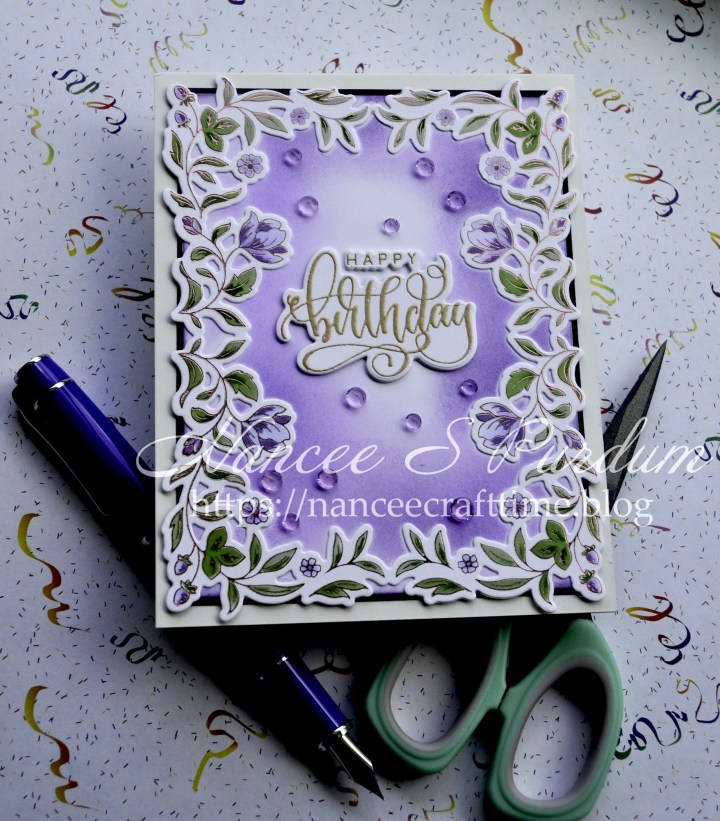
- I placed my finished border on the card and then added the sentiment to the middle.
- To finish it off, I add some clear crystals to the middle of the card for some sparkle.
This was a fun card to put together. I love the border and will find other ways to use it on future cards.
Thanks for stopping by and Happy Crafting!

Supplies used:
Gina K: Master Layouts #1, Edible Eggplant cardstock, Fancy Phrases stamp & die, Rose Gold embossing powder
Pinkfresh Studio: Making Things Happen Betterpress plate, stencil & die, Crystal Essentials
Ranger Distress inks: Shaded Lilac, Dusty Concord, Spiced Marmalade, Squeezed Lemonade, Wilted Violet, Bundled Sage, Mowed Lawn, Rustic Wilderness
Spellbinders: Rose Gold foil
Other: VersaMark Watermark ink
Tools used:
Altenew: 9″ X 12″ Ultra Sticky Mat, Stamping Wheel
Gina K: Intri-Cut die cutting & embossing machine
Spellbinders: Glimmer Foiling system

