
My card today combines several different stamp and die sets as well as a BetterPress plate. You don’t have to always use just one stamp and die set to create your cards. You can add different items from different sets to create a unique card. By using color, you can tie the stamp sets together. This is what I did today.

I didn’t have a plan for this card, so after selecting a couple different stamp sets, I stamped the images using my Stamping Wheel. This allowed me to stamp the images a couple of times knowing that the images would stamp in the same place.
I then added my stamped images and colored them using the coordinating stencils. I wanted to make a peach colored card but after coloring the images, I realized that I should have used slightly different colors.
I die cut all of the images using the coordinating dies. For the border, I cut three additional copies and added them to the back of the colored image.
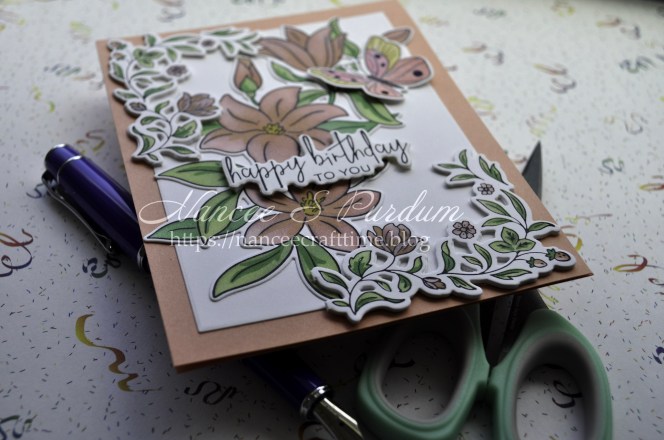
I had thought I would create a border around the Delighted For You images, but when I placed my images on a white panel, I wasn’t happy with the layout. My center image was too large so when I placed the border, a large portion of that image was hidden. So, I changed my mind and my layout.
I cut the border in half and then in half again. I placed one part of the border on one corner and the other on the opposite corner. I was happy with the look.
I added the center image to a white panel which I had already adhered to a peach-colored card base. I then added the corner borders to the card. I felt it needed something else, so I stamped and colored a butterfly to add to the card. I added some Aqua Shimmer to the butterfly wings to give them some sparkle. I also added a black glaze pen to the dots on the butterfly wings.
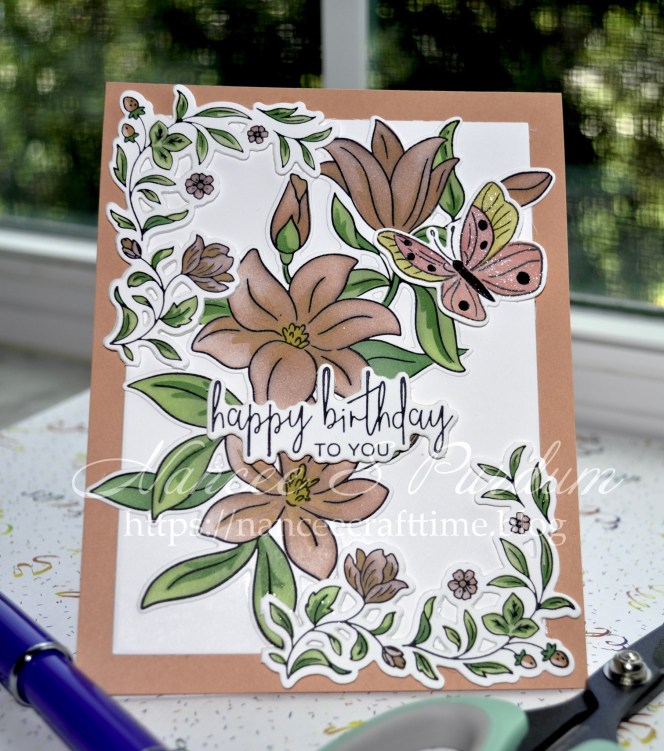
I didn’t want the butterfly to appear flat, so I added glue to the middle of the butterfly. Once it was dry, I added a glob of glue underneath the wings and let it dry. When the glue was dry under the wings, they appear to be “raised” as if in flight.
My final step was to add my sentiment. I used my BetterPress system and the A Little Message Sentiments plate. After running the BetterPress system through my Intri-Cut, I die cut the sentiment using the matching die. Instead of cutting extras to add behind the sentiment, I added foam squares to pop the sentiment up over my image.

By combining your stamp and die sets, you can get different looks. You can also alter your images to give them different looks. Even though my borders were all one piece, by trimming them I could alter the look.
Thanks for stopping by and Happy Crafting!

Supplies used:
Gina K: Master Layouts #1, Peach Bellini cardstock, Detail Clear embossing powder
Pinkfresh Studio: Delighted For You stamp, stencil & die; Making Things Happen stencil & die; Fluttering Butterflies stamp, stencil & die
Spellbinders: A Little Message Sentiments Betterpress plate & die
Gina K ink: Black Onyx
Hero Arts ink: Fresh Peach, Green
Simon Says Stamp inks: Sunbeam, Melon, Blush, Goldenlocks
WPlus 9 inks: Sweet Nectar, Miami Spice, Beanstalk, Mojito
Other: VersaMark Watermark ink, Nuvo Aqua Shimmer
Tools used:
Altenew: 9″ X 12″ Ultra Sticky Mat, Stamping Wheel
Gina K: Intri-Cut die cutting & embossing machine

