
As a card maker with a large family, I like to have cards on hand that I can quickly add a sentiment to and get in the mail. Today’s cards are some of those cards. These cards combine stenciling, foiling and die cutting. For these cards, I used the Fuse Foiling System which uses different products than the Glimmer Hot Foiling system.
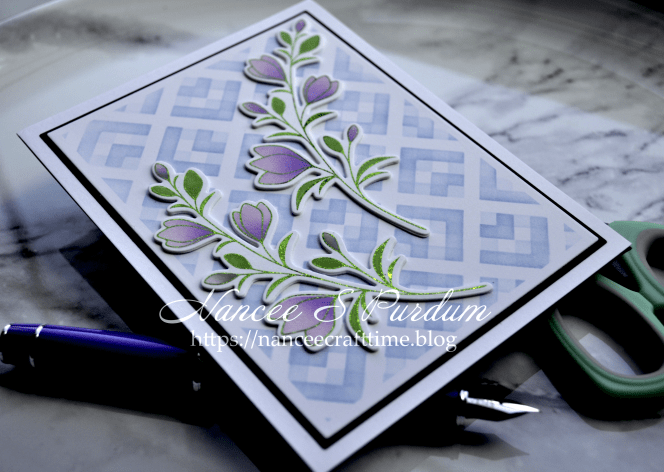
For my first card, I used Master Layouts to cut both a white panel and a black mat. The following are the next steps that I used to create my card:
- I applied Masking Magic around the outside of my card panel to create a nice white crisp border.
- I used added my white cardstock to the middle of my sticky mat and placed the first stencil over the cardstock. I applied my first layer of ink.
- I pulled up my stencil and turned it one quarter of a turn and placed it back over my cardstock lining it up with what I had already inked.
- After applying another layer of ink I removed the Masking Magic.
I did not apply any additional ink around the Masking Magic. When I removed the Masking Magic, I had a nice crisp border.
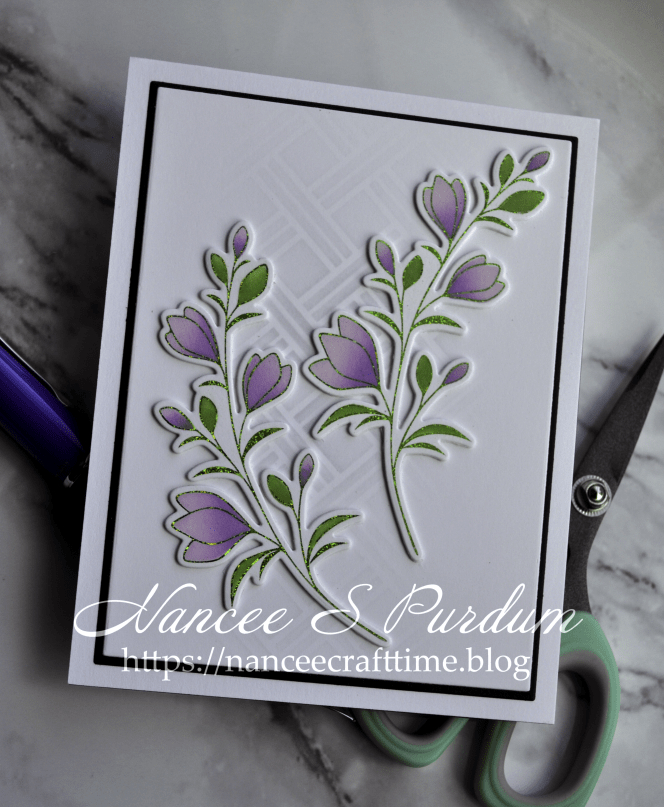
For my second card, I followed the same steps except used Decorative Double stencil and Soft Stone ink.
For my focal point, I decided to use the Delicate Flowers Poly-Glaze cardstock to add foil to my images.
- The Delicate Flowers Poly-Glaze comes in a large sheet, so I cut out the images I wanted to use for my cards.
- I added foil to the images and ran them through the Fuse Foiling System.
- Once I had my images foiled, I placed them on my sticky mat and placed the coordinating stencil over each image and added my first layer of color.
- Before removing my first stencil, I added a little bit of darker color to each of the colored images.
- I added the second stencil and used a darker color to finish the coloring of my images.
- Using the coordinating die, I cut the images out along with three additional from white cardstock.
- I placed three of the white cardstock die cuts behind each image to “pop” the up on my card base.
I will add a sentiments in the future when I am ready to send the cards and will probably also add some small pearls or other bling to finish the card.
Thanks for stopping by and Happy Crafting!

Supplies used:
Gina K: Delicate Flowers stamp & die, Delicate Flowers stencil, Delicate Flowers Poly-Glaze, Twirl-it Gingham stencil, Glittering Green foil, Black Onyx cardstock, Masking Magic
Gina K inks: Lucky Clover, Lovely Lavender, Wild Lilac, Plum Punch, Powder Blue
Tools used:
Altenew: 9″ X 12″ Ultra Sticky Mat
Gina K: Intri-Cut die cutting and embossing machine, Fuse foiling system


beautiful card, lovely colours!
LikeLiked by 1 person
Thanks Kim!
LikeLike