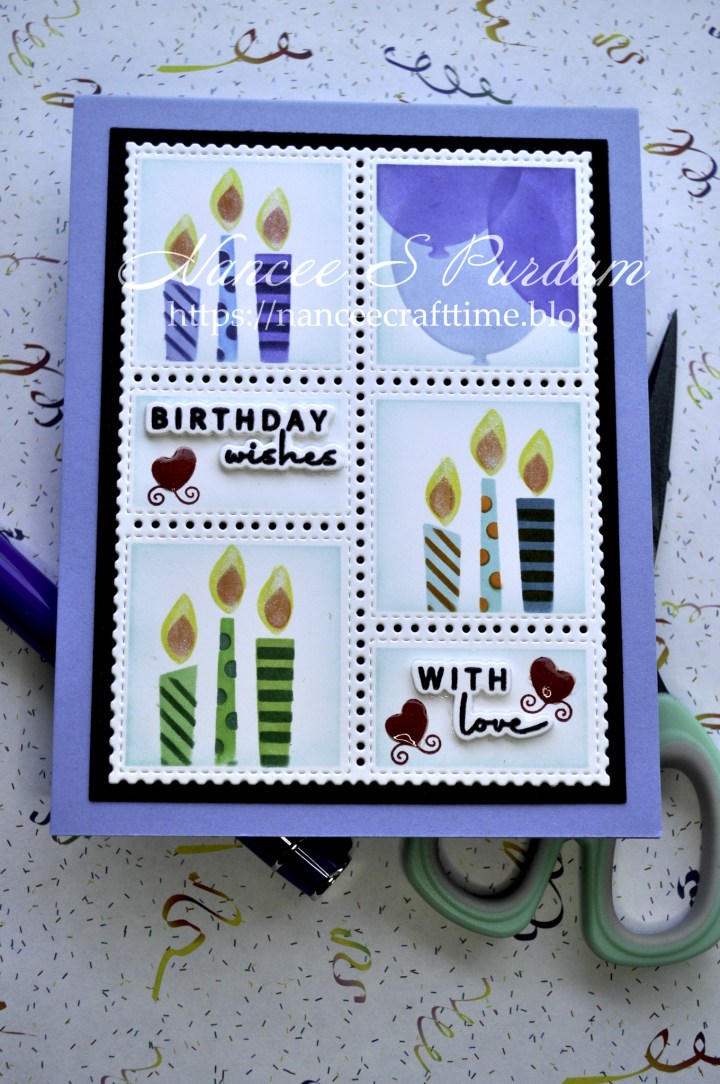
My card today features several Gina K products. This was a fun card to put together and went to a very special person.
To make this card, I used three different stencil sets to create one card.

For my card panel:
- I first cut my white and black card panels using Master Layouts #14.
- Master Layouts #14 has a coordinating stencil so you can add images or color to each individual sections as it masks off the borders around each section.
- I used my Altenew Ultra Sticky Mat to secure my white card panel and then added the Master Layouts #14 stencil, making sure to line up area around the smaller sections.
- I placed small sticky notes around the upper right hand corner section so when I started my ink blending I wouldn’t get any ink where I didn’t want it.
- I then placed the first of the Layered Candles stencil in the opening for the section. I centered it so that there were only three candles in that section.
- I added the first layer of color to that section and then moved on to the middle section on the right side.
- I repeated the process of adding the sticky notes around the section and then adding color to the stencil after centering it to again show three candles.
- Finally, I moved to the lower left section and repeated the same process of masking off the other areas and adding the three candles.
- I repeated the same process for the second stencil for the Layered Candles in each of the sections I colored with the first stencil.
You can layer different stencils over each other to get a different look. The Master Layouts #14 stencil helps mask off the different areas so you can get a clear crisp edge. You don’t always have to use stamps in smaller areas. By masking an area, you can fill it with any medium or style you want keeping it to just one area on your card.
Continuing the process:
- For the upper right corner, I used the Bold Balloons stencil. This stencil is not a layering stencil, but a single stencil.
- I again used post it notes to block off the sections around it before adding any ink.
- I first added the balloon in my lightest color.
- I then moved the stencil up and over towards the corner and added a slightly darker color, overlapping the first balloon.
- I again moved the stencil but this time towards the right side and down slightly from my second balloon.
- Because I still had the Master Layouts #14 stencil in place over my panel, when I added my balloons, it kept the image to just inside that section.
- I had decided to add my sentiments to the two smaller sections and also stamp a small image in around my sentiments.
- I stamped my sentiments in black ink and again in VersaMark Watermark ink.
- I added clear embossing powder and heat set them.
- I cut the sentiments out using the coordinating dies along with two additional in white cardstock to add to the back of the sentiments.
Finishing up my card:
- Before removing the Master Layouts #14 stencil, I added a light ink around the inside of each of the sections. When I removed the stencil, this left a nice crisp white border around each section and helped to define those spaces.
- I removed the card panel and placed it in my Stamping Wheel so I could add the small hearts. I positioned my sentiments where I wanted them but did not adhere them yet. I could then place the heart stamps in the space around where I would place my sentiments.
- I stamped the heart images and then removed my panel form my Stamping Wheel.
- I adhered the white panel to the black mat and then to the powder blue card base.
- I then added the sentiments.
- To add some sparkle to the candle flames, I added some Aqua Shimmer and then Glossy Accents for the shine.
This completed my card. I used three candles in each of the openings to for his 9th birthday. I didn’t have room to add that it was his 9th birthday but thought using the 9 different candles would work, and it did.
Thanks for stopping by and Happy Crafting!

Supplies used:
Gina K: Master Layouts 14, Post Grid stencil, Bold Balloons stencil, Layered Candles stencil, All Occasion Flowers, Ice Cream Social stamp, Powder Blue cardstock, Black Onyx cardstock, Detail Clear embossing powder
Gina K inks: Sea Glass, Powder Blue, Blue Denim, Blue Raspberry, Ocean Mist, Turquois Sea, Tranquil Teal, Applemint, Lucky Clover, Jelly Bean Green, Wild Dandelion, In the Navy, Tangerine Twist, Christmas Pine, Tomato Soup, Sweet Mango, Black Onyx, Cherry Red
Other: Ranger Glossy Accents, Aqua Shimmer, VersaMark Watermark ink
Tools:
Gina K Intri-Cut die cutting and embossing machine
Altenew 9″ X 12″ Ultra Sticky Mat, Stamping Wheel

